
It's been long overdue for me to write instructions on shimming the gas cylinder but I have finally gotten around to it. I won't go too much into the "why's" of shimming the gas cylinder but if you want to know more on the subject, I suggest you read this thread by Gus Fisher:
http://www.m14tfl.com/upload/showthread.php?t=67322
I will say though, that if your front band is flappin' around when fully assembled, it will degrade accuracy. Shimming the gas system is one of the most beneficial fixes you can do to help extract accuracy from your rifle.
In short, if your gas lock snugs up past the 6 o'clock position, meaning that when you have tightened the gas lock up, you have to back it off a little to get the holes lined up to insert the gas plug, then you should insert shims between the barrel shoulder and the front band to make your gas lock snug up just before the 6 o'clock position (perfectly lined up for insertion of the gas plug) and require a little force by hand or by use of a gas lock/cylinder wrench to fully line up the lock with the gas cylinder.
If your gas system already has ideal lockup, then shims are not needed and you are good to go! Also, since some commercial parts are not as consistent as GI parts, commercial gas locks may lock up differently if the lock is flipped over (from front to back, not top to bottom). What this means is to reverse the lock so that the side which is now facing toward the front of the rifle is now facing the back of the rifle. This may give you more of an ideal lockup.
You can obtain shims from Claude, at RA parts or from Smith Enterprise. Here is what they look like..
![Image]()
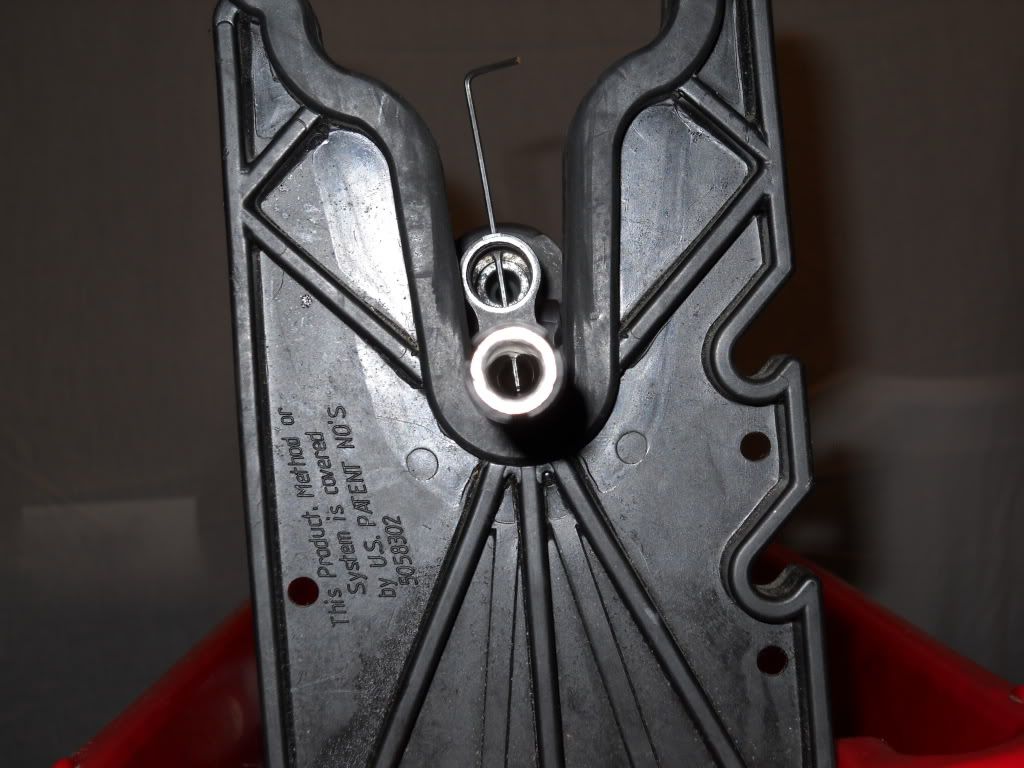
You will need a set of castle nut pliers, a 1/16" allen wrench, a 3/8" boxed end wrench, BAD-T1 tool or a USGI multi tool to perform this procedure. You will also need a gas cylinder/lock wrench or a large crescent wrench to support the gas system when removing the flash suppressor.
Remove the castle nut set screw.
![Image]()
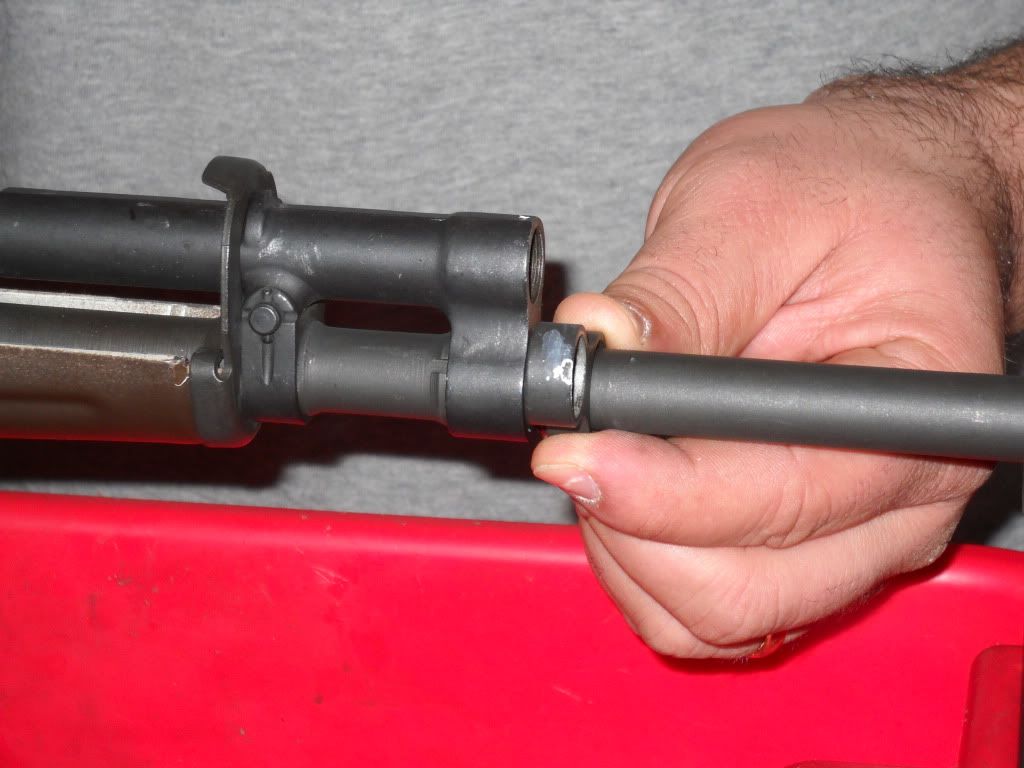
Using the gas cylinder wrench and your castle nut pliers, remove the flash suppressor.
![Image]()
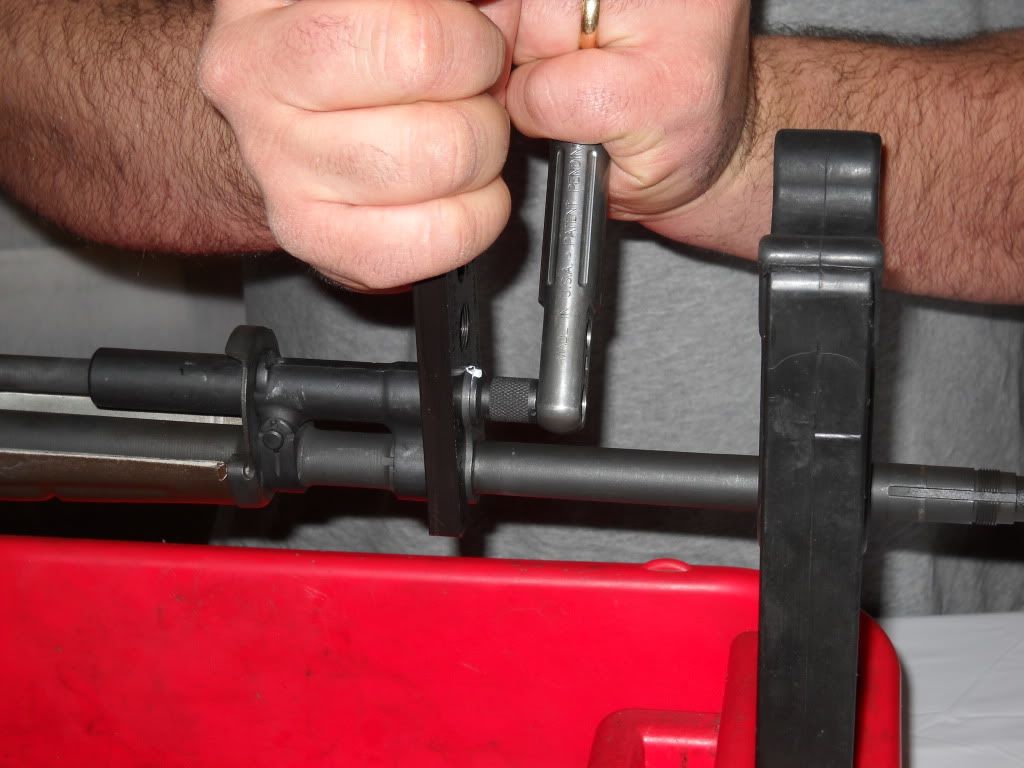
Make a mark with some white-out or marking device of some sort to indicate your gas plug torque (allow to dry). Using a gas cylinder wrench and your multi-tool (3/8" box end wrench), remove the gas plug.
![Image]()
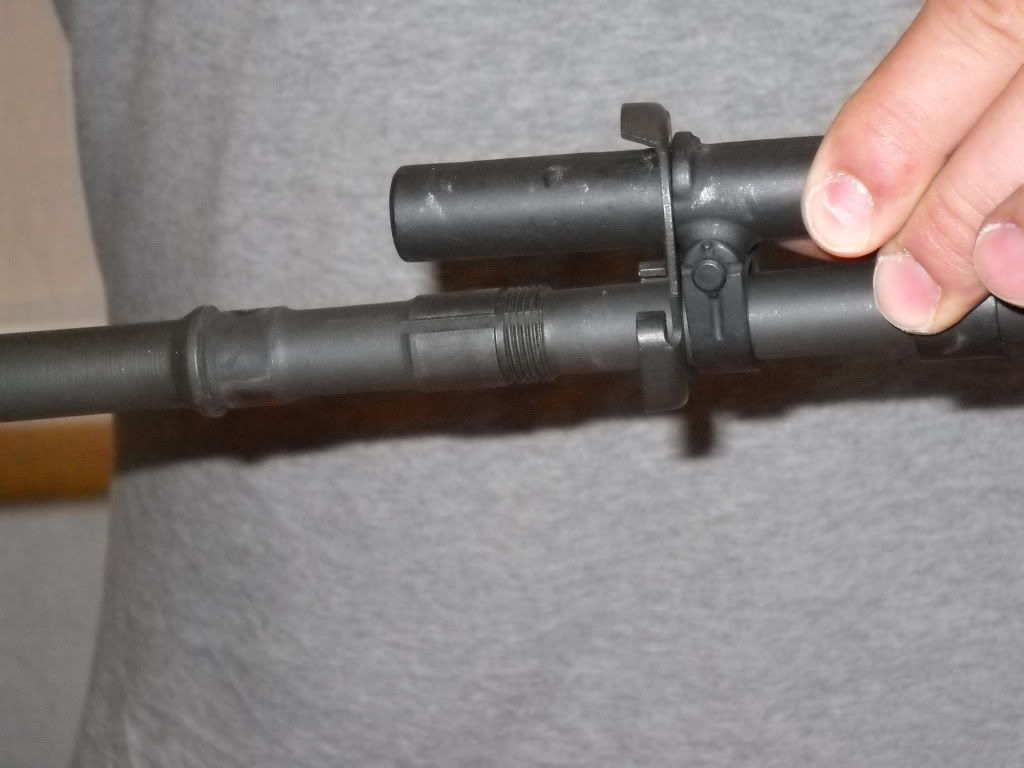
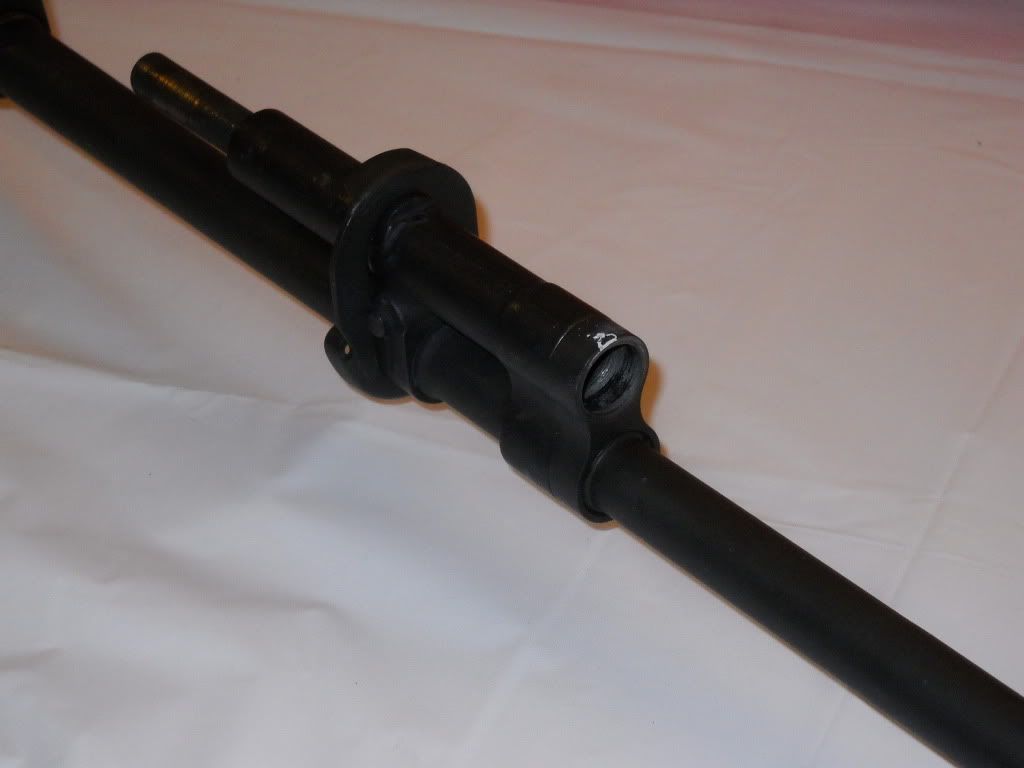
Loosen and remove your gas lock. Remove the gas cylinder and front band.
![Image]()
![Image]()
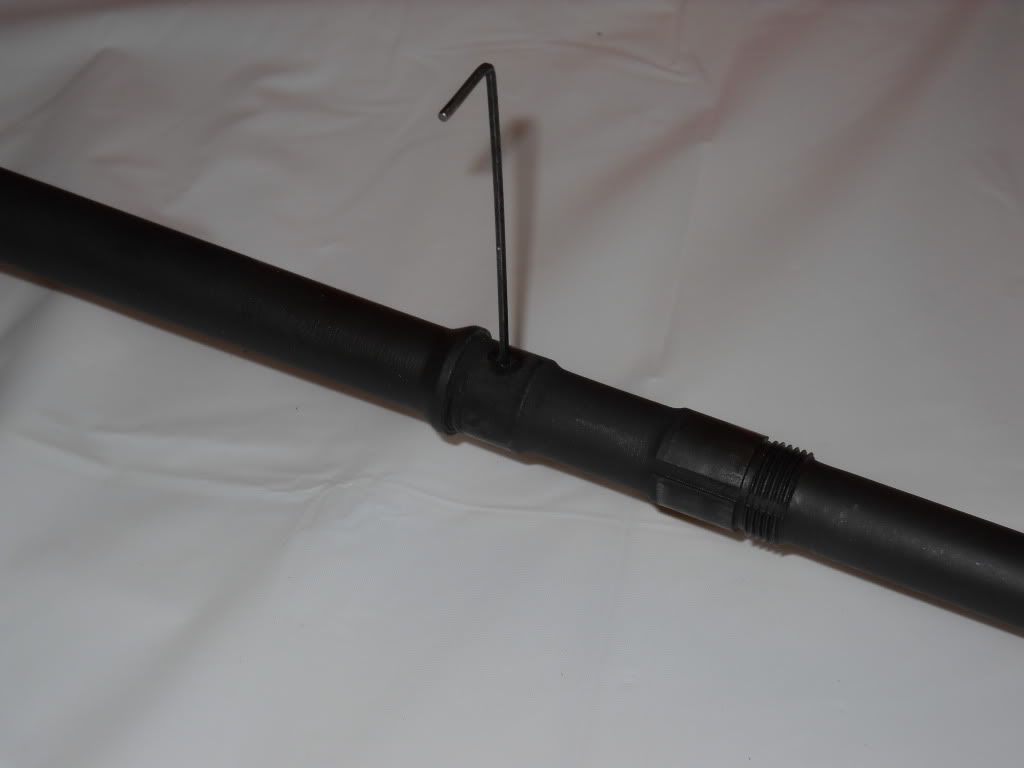
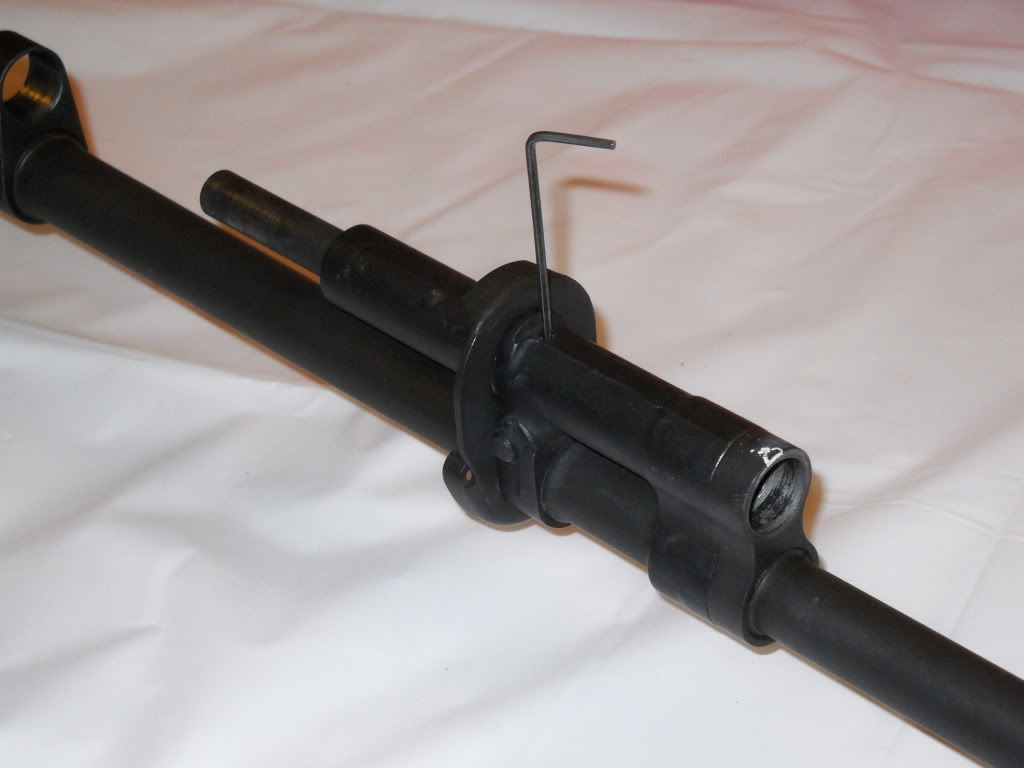
Now you should be able to see the barrel gas port. Test fit an allen wrench which can be fully inserted into the barrel. I found that a 1/16" allen wrench fit nicely. We will use this to verify that the gas cylinder is properly aligned with the barrel when done.
![Image]()
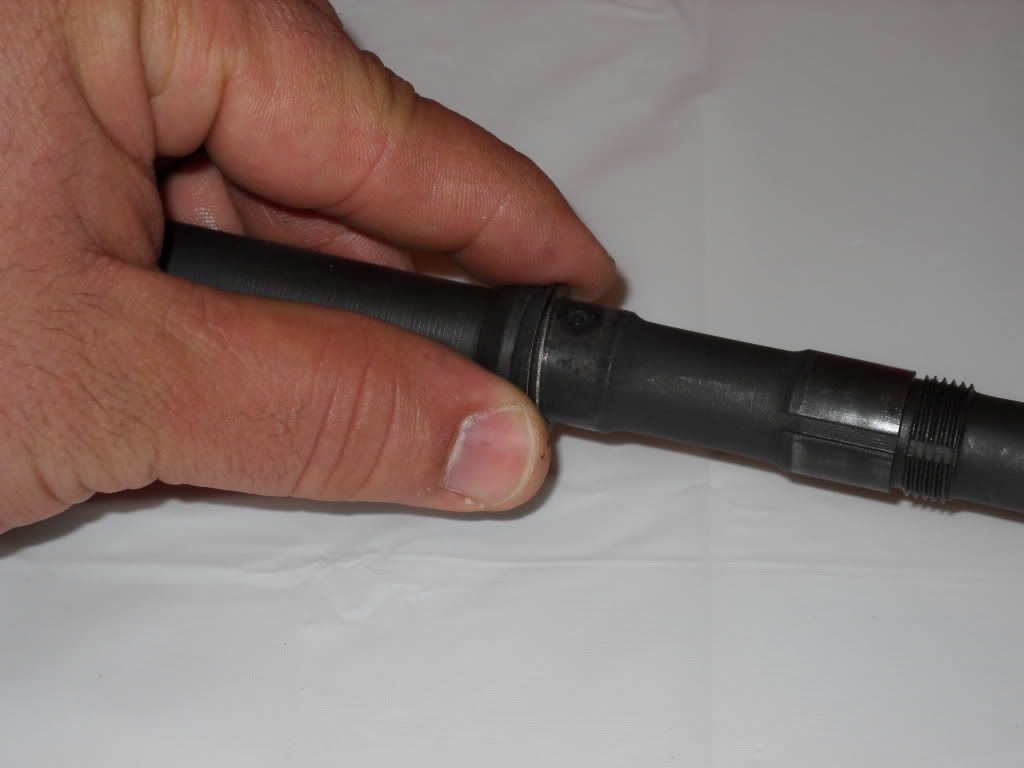
Slip the shims onto the barrel like so...
![Image]()
Now test fit your gas system by installing the front band gas cylinder and gas lock. Depending on how much slop you had in the gas system, you may need one, two or all of the shims. Your shim set will come with different thicknesses of shims so play with them until you find the correct lockup. It will be properly locked up when it snugs at the 5 o'clock position and can be tightened with finger force or light force with a gas cylinder wrench. When shimming, if you find that your gas lock locks up before the 4:30 position, it is too tight! it can have negative effects on accuracy. Try to obtain the 5 o'clock position. That's the "sweet spot"
Here is the correct lockup position:
Snug...
![Image]()
Locked...
![Image]()
Once you have good lockup, it is time to check your gas port alignment. Slip the 1/16" allen wrench into the gas port in the gas cylinder and insert it until you can see it in the barrel. It should go in with ease and move around freely. If it takes some force but you can still insert the wrench, your gas ports may not be aligned very well. If you can't insert it at all, your ports are not aligned and you will have cycling issues.
![Image]()
You should be able to see the wrench protrude into the barrel as so...
![Image]()
Once you have achieved proper lockup and gas port alignment, remove the allen wrench, install your gas piston and gas plug and you are ready to go.
Tip: If your gas system is not unitized, don't snug up your gas lock until your barreled action is installed in your stock. Once it is, snug the lock and finish assembling your gas system. This will allow your front band to find a neutral position against the stock ferrule (you want this).
http://www.m14tfl.com/upload/showthread.php?t=67322
I will say though, that if your front band is flappin' around when fully assembled, it will degrade accuracy. Shimming the gas system is one of the most beneficial fixes you can do to help extract accuracy from your rifle.
In short, if your gas lock snugs up past the 6 o'clock position, meaning that when you have tightened the gas lock up, you have to back it off a little to get the holes lined up to insert the gas plug, then you should insert shims between the barrel shoulder and the front band to make your gas lock snug up just before the 6 o'clock position (perfectly lined up for insertion of the gas plug) and require a little force by hand or by use of a gas lock/cylinder wrench to fully line up the lock with the gas cylinder.
If your gas system already has ideal lockup, then shims are not needed and you are good to go! Also, since some commercial parts are not as consistent as GI parts, commercial gas locks may lock up differently if the lock is flipped over (from front to back, not top to bottom). What this means is to reverse the lock so that the side which is now facing toward the front of the rifle is now facing the back of the rifle. This may give you more of an ideal lockup.
You can obtain shims from Claude, at RA parts or from Smith Enterprise. Here is what they look like..

You will need a set of castle nut pliers, a 1/16" allen wrench, a 3/8" boxed end wrench, BAD-T1 tool or a USGI multi tool to perform this procedure. You will also need a gas cylinder/lock wrench or a large crescent wrench to support the gas system when removing the flash suppressor.
Remove the castle nut set screw.
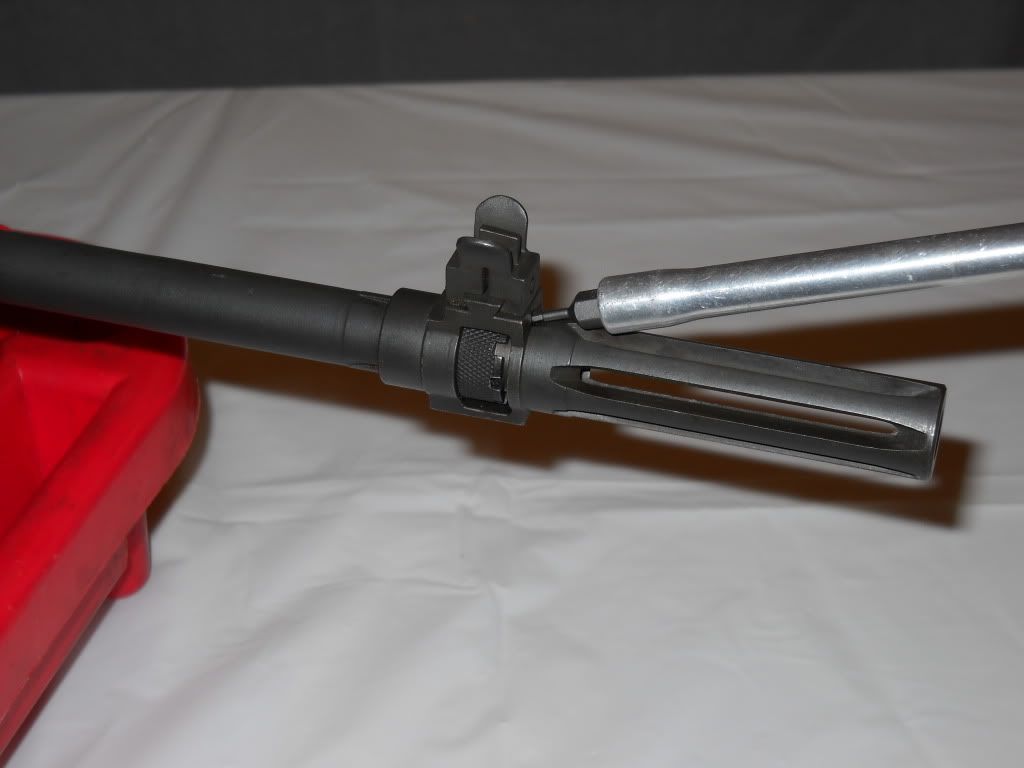
Using the gas cylinder wrench and your castle nut pliers, remove the flash suppressor.
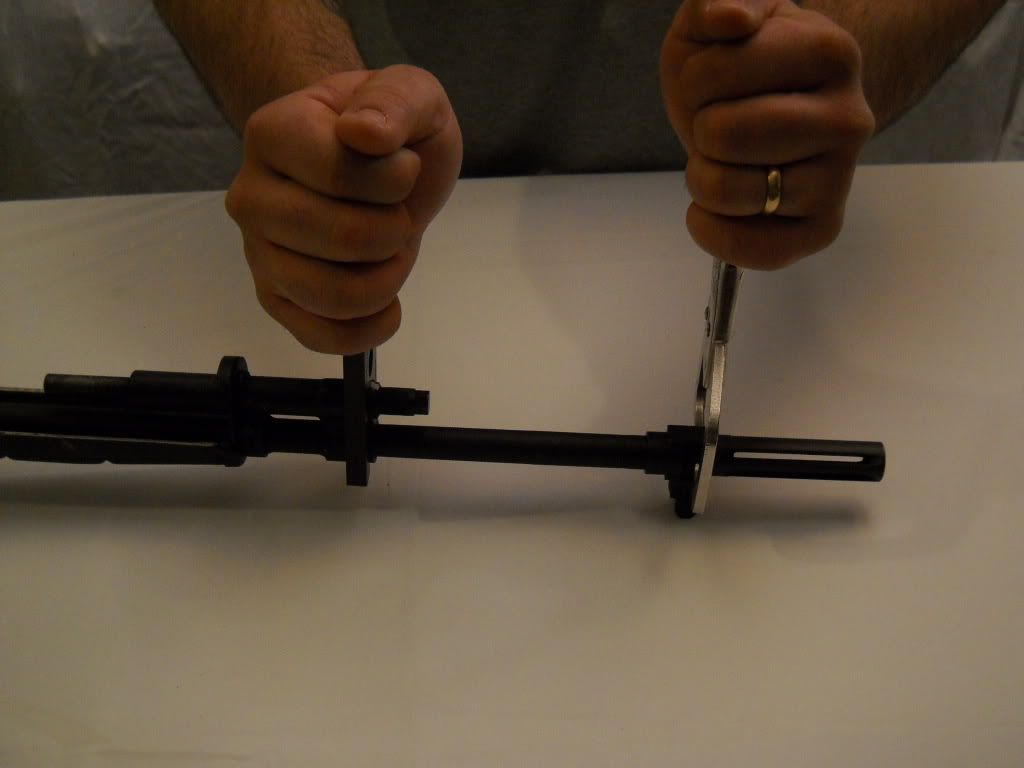
Make a mark with some white-out or marking device of some sort to indicate your gas plug torque (allow to dry). Using a gas cylinder wrench and your multi-tool (3/8" box end wrench), remove the gas plug.
Loosen and remove your gas lock. Remove the gas cylinder and front band.
Now you should be able to see the barrel gas port. Test fit an allen wrench which can be fully inserted into the barrel. I found that a 1/16" allen wrench fit nicely. We will use this to verify that the gas cylinder is properly aligned with the barrel when done.
Slip the shims onto the barrel like so...
Now test fit your gas system by installing the front band gas cylinder and gas lock. Depending on how much slop you had in the gas system, you may need one, two or all of the shims. Your shim set will come with different thicknesses of shims so play with them until you find the correct lockup. It will be properly locked up when it snugs at the 5 o'clock position and can be tightened with finger force or light force with a gas cylinder wrench. When shimming, if you find that your gas lock locks up before the 4:30 position, it is too tight! it can have negative effects on accuracy. Try to obtain the 5 o'clock position. That's the "sweet spot"
Here is the correct lockup position:
Snug...

Locked...
Once you have good lockup, it is time to check your gas port alignment. Slip the 1/16" allen wrench into the gas port in the gas cylinder and insert it until you can see it in the barrel. It should go in with ease and move around freely. If it takes some force but you can still insert the wrench, your gas ports may not be aligned very well. If you can't insert it at all, your ports are not aligned and you will have cycling issues.
You should be able to see the wrench protrude into the barrel as so...
Once you have achieved proper lockup and gas port alignment, remove the allen wrench, install your gas piston and gas plug and you are ready to go.
Tip: If your gas system is not unitized, don't snug up your gas lock until your barreled action is installed in your stock. Once it is, snug the lock and finish assembling your gas system. This will allow your front band to find a neutral position against the stock ferrule (you want this).


